One of my favourite things about photography is being able to capture a moment that feels important and sharing it. It feels like through photography I can share an impression of how my mind works with others, so as a result I consider being able to share my photos in the best quality possible to be a high priority.
Of course there are plenty of platforms that allow photo sharing such as social networking sites, instant messaging services or typical cloud storage such as Google Drive. However, there are many limitations to these - services like Twitter (also known as X), Instagram and Facebook increasingly require viewers log in with an account to see any photos and restrict how images embed in other sites. Social networking sites and instant messaging services also use heavy compression or limit file uploads, which has a very noticeable effect on the quality of the photos. Cloud storage is also bad for visibility, requiring sharing links to be set up manually for each folder I want to share.
What if having my own curated photo gallery on the internet for anyone to view, under my own domain, was instead as easy as uploading them to a single location? What if I told you this is possible with little more than a £5/month VPS that I’m already paying for and no additional costs?
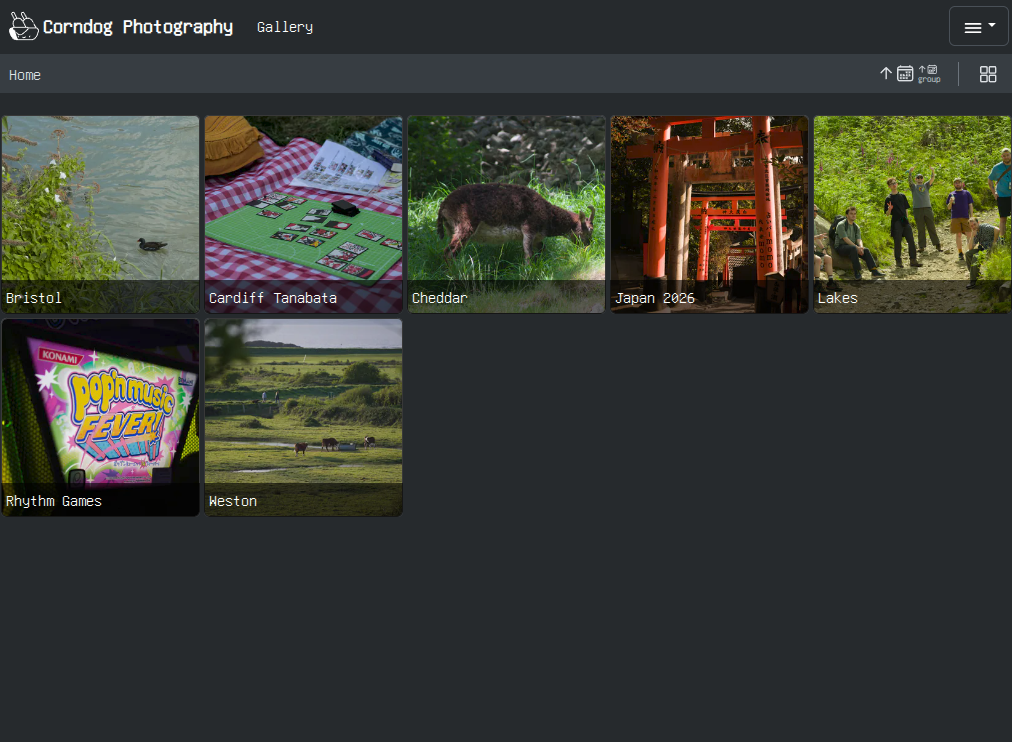
Allow me to introduce you to gallery.corndog.cc, my self-hosted gallery for sharing my photography. This is a pigallery2 photo gallery deployed with Docker on my VPS and using Cloudflare R2 as free S3-compatible storage for storing all of the photos. In this blog post, I’ll share step-by-step how I went about setting this up.
Overview
The stack can be represented as the following:
                      Cloudflare R2
                           │
                           │ rclone mount with caching
                           ▼
                     Photo directory
                           │
                           │ read-only
                           ▼
                    ┌──────────────┐
                    │  PiGallery2  │
                    │  Container   │
                    └──────┬───────┘
                           │
                      127.0.0.1
                           │
                           ▼
                         Nginx
                           │
                           │ HTTPS
                           ▼
                domain (gallery.corndog.cc)
Step 1: Create Cloudflare R2 bucket
Signing up to Cloudflare R2 is free, and provides you with 10GB per month of S3-compatible storage with no egress fees that can be mounted to any machine using rclone - this is great for us since we are just hosting static files that can then be cached on the server if frequent access is needed. Once the account is created, create and name a private bucket, then create an API token for it that has Object Read and Write permissions restricted only to that bucket. Make a note of the bucket URL which should be in the form of https://<your_account_id>.r2.cloudflarestorage.com.
It may be helpful at this point to upload a handful of photos to the bucket to test with later. Note that due to the implementation of buckets, there does not exist a concept of “folders” like you’d expect on a traditional file system, but prefixes that can be added to the beginning of files uploaded to the bucket. These are interpreted as directories when the bucket is mounted using rclone.
Step 2: Prepare the OVH VPS
The main important thing here is to make sure Docker, Docker Compose and rclone are installed on your server of choice. You should also create these directories for the photos and for use by pigallery2:
/opt/photos/(or your preference instead of photos)/opt/pigallery2//opt/pigallery2/config//opt/pigallery2/db//opt/pigallery2/tmp/
Step 3: Configure and test rclone to R2
rclone can be configured by typing rclone config into your terminal and following the CLI instructions.
- New remote: r2
- Storage: S3
- Provider: Cloudflare R2
- Access key, secret key and endpoint: can be found in the API key settings on Cloudflare’s website.
When the configuration is added, you can test the connection using rclone lsd r2: to view “directories” in the bucket, or rclone ls r2:<bucket name> to view files in the bucket.
In step 8, we will look at how to mount the bucket to the server, but first we should focus on setting up the gallery and exposing it to the internet via Nginx.
Step 4: Run PiGallery2 with Docker
I manage most if not all the services running on my VPS using Docker Compose. Running pigallery2 with it is great for easily starting up the service and providing access to the mount points it needs to function.
This is an adaptation of the Docker Compose file I use to deploy pigallery2:
services:
  pigallery2:
    image: bpatrik/pigallery2
    container_name: pigallery2
    restart: unless-stopped
    volumes:
      - /opt/pigallery2/config:/app/data/config
      - /opt/pigallery2/db:/app/data/db
      - /opt/pigallery2/tmp:/app/data/tmp
      - /opt/photos:/app/data/images:ro

    ports:
      - "127.0.0.1:8085:80"
Notice that /opt/photos is mounted as read-only - we should not and do not need to provide pigallery2 with the ability to write files to the bucket, treating the bucket itself as the source of truth and using Cloudflare’s website to upload photos to the bucket.
Step 5: Put PiGallery2 behind HTTPS
I use Nginx to handle reverse proxying on my VPS, which allows me to use it as a gateway into other services that I wish to expose. I also use Certbot to ensure all my public web services (including this one!) are secured with HTTPS. This is just a basic adaptation of my config - note that sections of this configuration that are managed by Certbot have been removed for brevity’s sake.
server {

    server_name example.com; # gallery.corndog.cc

    location / {
        proxy_pass http://127.0.0.1:8085;

        proxy_http_version 1.1;

        proxy_set_header Host $host;
        proxy_set_header X-Real-IP $remote_addr;
        proxy_set_header X-Forwarded-For $proxy_add_x_forwarded_for;
        proxy_set_header X-Forwarded-Proto $scheme;

        proxy_set_header Upgrade $http_upgrade;
        proxy_set_header Connection "upgrade";

        proxy_read_timeout 300s;
        proxy_send_timeout 300s;
    }

}
If all things have gone well, then the gallery should be up and running on your own domain! However, it is necessary to make some changes to pigallery2 first.
Step 6: Configure pigallery2
The default configuration for pigallery2 is not great for immediate use and uses some questionable defaults. Firstly, the site requires login by default and provides an admin account with a default password. You should definitely update this to a more secure password before anything else!
Secondly, there are features that I didn’t particularly want to keep enabled on my gallery, such as geotagging or face detection among others. You can configure these while logged in as an admin or by directly editing the config.json file located at /opt/pigallery2/config mounted to the container.
Once happy with the changes, set authenticationRequired to false and make sure to set unAuthenticatedUserRole to “User” - this is set to “Admin” in the default config!!! After making the config changes, restart your pigallery2 Docker service and you should see the changes applied.
Step 7: Use systemd service to mount the bucket
This step ensures that the mount point stays up to date with files on the bucket and provides a cache so that files don’t need to constantly be retrieved from R2.
First off, install fuse3 to allow our systemd service to manage mounting to the filesystem. Create a cache directory such as /var/cache/rclone/photos and also take note of where our rclone config created earlier exists; for me it was at /home/debian/.config/rclone/rclone.conf.
Create a new file using sudo nano /etc/systemd/system/rclone-r2-photos.service and paste the configuration below. Note that you may tweak the values given as you see fit, particularly --vfs-cache-max-size, ensuring that it suits the capacity of your server:
[Unit]
Description=Mount Cloudflare R2 photo bucket with rclone
After=network-online.target
Wants=network-online.target

[Service]
Type=notify
User=root
Group=root

ExecStart=/usr/bin/rclone mount r2:bucket-name /opt/photos \
    --config=/home/debian/.config/rclone/rclone.conf \
    --allow-other \
    --dir-cache-time=1h \
    --vfs-cache-mode=full \
    --vfs-cache-max-size=1G \
    --vfs-cache-max-age=24h \
    --cache-dir=/var/cache/rclone/photos \
    --vfs-read-chunk-size=16M \
    --vfs-read-chunk-size-limit=128M \
    --buffer-size=32M \
    --log-level=INFO \
    --log-file=/var/log/rclone-r2-photos.log

ExecStop=/bin/fusermount3 -u /opt/photos

Restart=on-failure
RestartSec=10

[Install]
WantedBy=multi-user.target
Start the service by running sudo systemctl daemon-reload and sudo systemctl enable --now rclone-r2-photos. Now our bucket is mounted to the server and has a local VFS cache which should handle access to frequently accessed photos.
Conclusion
The above steps are not a perfect step-by-step guide on what I did to set up this gallery, but should serve as a rough plan on how to set it up for yourself. Your own use case may vary, and my choice of solutions may not suit the same needs as yours. However, I can say for sure that this is a very lightweight setup, costing me nothing extra as I already use my VPS for many projects. Thank you for reading this far, and feel free to check out my gallery for youself!